Queen rearing

Small Scale Queen Rearing

By Rudy Repka, Sidcup, Kent BKA.

Queen rearing is easy, interesting and a rewarding beekeeping activity. Unlike queen breeding, it does not require any particular knowledge of genetics. There are several methods for queen rearing, each with some modifications, but they all pursue the same principle: to follow bees’ instincts and with a measure of control create the conditions, which will encourage your selected colony to favour its reproduction.

 Timing for queen rearing

 It  is  an  advantage  to  use favourable  climatic  conditions  in  the  late  spring,  which  naturally  stimulate  this  colony reproduction.  In the UK,  the  best  time  to  start  queen  rearing  is  from  mid  May  to  mid  June.  With luck,  you  may catch  the  spring  nectar  flow,  which  will  help  to  feed  your  developing  queen  larvae.  A month later your newly mated queens will start laying with the help of the early summer flow, establish their little colonies thus allowing you to assess their qualities soon after. If you do it a little earlier or much later, it can be something of a challenge.

Rearing  one’s replacement  queens allows the  beekeeper  to  have  a  real influence  on  the selection  for  the  desired over undesirable colony qualities. This basis of good bee management and enables the beekeeper to replace at will the queens which are heading his or her colonies. With small adjustments, the technique is suitable for rearing any number of mated queens. The  limiting  factor  is  the  number  of support  colonies  you  wish  to  maintain.  One large colony, dedicated to the queen rearing, can on its own raise a batch of perhaps twelve to fifteen mated queens. Such a colony will easily nurture forty or more grafted larvae, but you will need the equipment and bees for populating the mating nucleus hives. For scaling up your queen rearing to raise many more queens, you may need several large prosperous support colonies, providing an adequate supply of fresh frames with emerging brood and young bees to your main queen rearing colony, so that it can nurture further batches of fresh grafts. These can be inserted every five days. The previous batch of sealed queen cells can be moved on to other incubator colonies. If you do not wish to  run  incubator  colonies,  you  can  insert  a  fresh  batch  of  grafted  cells  into  your  queen  rearing  colony  every  ten days.

Drone selection

Although I am not dealing with queen breeding here, it is still worthwhile to consider the drones your queens will mate with. They will mate  with any fit drones in the drone congregation area, but you can, if you choose, add  to this  mix  a  proportion  of  your  own  drones  possessing  the  qualities  you  want.  If you wish, try rearing your own drones and you will notice a clear influence on the quality of your queens; give your drones a head start, about a month before you commence with queen rearing. Drones take longer to develop at the larval stage, and even longer to  reach  their sexual  maturity  after  emerging  so  you  need  to  consider  starting  this  part  of  your  queen  rearing process in late March, weather permitting. Surprisingly, rearing of your sought-after and fit drones, with viable sperm, can be more difficult than anticipated. Select  a  suitable  colony,  whose  bees  have  the  required  qualities,  and  insert a  frame  or  two,  fitted  with  the  drone base foundation. Feed this colony well with both syrup and pollen, or with pollen substitute. Once drawn out and laid up with eggs, the frames can be transferred to other foster colonies to raise the drones. The colonies, which are raising the drones intended to mate with your virgins should not be subjected to any varroa treatments based on pyrethroids, organophosphates, or thymol.  These acaricides have detrimental effects on the sperm viability and on the general fitness of drones.

 Larval transfer techniques

There is a variety of larval transfer methods that can be used. It is not strictly essential to learn the simple skill of larval  transfer,  or  ‘grafting ‘using  a  grafting  tool,  but  the  technique  is very easy  to  learn, so  it  is  well  worth adopting.  Queen  rearing  students,  who  have  never  done  this  before,  usually  achieve  on  their  first  attempt  60%-75% graft acceptance. If grafting is not for you, perhaps because you may have poor eyesight, for around £70 you can buy a kit from thebe equipment suppliers, which will enable you to do larval transfer without the need for any skillet all. The main drawbacks of this, apparently easier method, is the need to find and entrap the queen in the cage supplied with the kit, in your breeding colony. Bees resent having their queen separated from her brood and once freed from her cage, they sometimes proceed to supersede her soon after.  A sad loss if her progeny has excellent qualities.

2The life cycle of the European races of an Apis mellifera queen:

Crucial timings to know when queen rearing

Stage                                                      Time

Egg                                                          3 days

Larva feeding                                        5 days or slightly less

Metamorphosis (pupa)                       7 days or so

Emerging                                               16th day or so, after egg has been laid. This can be slightly earlier.

1st orientation flight                            18th day or later

Earliest mating flight                           21st day or later

More usual mating flights                  23rd –28th day, or on day 7 –12 after emerging

Mating window closes                        32nd day, or about 16 days after emerging

Starts laying                                          about 2 –4 days after mating

The life cycle of honeybee queens

A few of the timings are important when rearing queens, so let us consider some basic facts of the life cycle of the European races of the Apis mellifera queen. All are close approximations; the actual time can vary slightly due to race, amount of food, climate and temperature among other reasons. We usually recognize four stages of queen rearing:

1. Graft acceptance or start up 

2. Cell building

3. Incubation and emergence

4. Mating

As  amateurs,  raising  only  a  few  queens,  we  usually  compress  these  four  stages  into  just  two:  Acceptance  of  the graft,  cell  building,  and  the  first  three  quarters  of  the  incubation  period  is  the  first  stage.  The last one quarter of incubation period, emergence and mating is the second stage. This second stage usually takes place in different and often quite small mating colonies.

A more advanced beekeeper may prefer three stages. Graft  acceptance  in  the  first,  usually  crowded,  but  small, queen less  colony,  is  the  first  stage.  Cell  building  plus  three quarters  of the  incubation  period,  often  in  a  different prosperous, queen right colony, is the second stage, and the last one quarter incubation, plus emergence and mating in nucleus colonies is the last stage. However, most professional breeders adhere to four separate stages, so let us consider each stage in little more detail.

Stage 1: Graft acceptance, start up

The start up colony needs to be suitably conditioned and prepared before it will start building queen cells. Bees will start building queen cells under one of three impulses; swarming, emergency, and supersedure.

 Swarming

If we do not wish to propagate the swarming tendency, we should reject the swarming impulse for raising queen cells. However, the conditions in the colony, which is making preparation to swarm, are perfect for raising queen cells.  Removing their queen and destroying all existing queen cells, will persuade bees to raise many queen cells from our donated material. You can use a swarmy colony but it is essential to destroy all queen cells which the bees will have started from their own larvae about a week after insertion of your grafts.

Emergency

Very soon after losing their queen, whether by accident or by design; bees are willing to start building queen cells. The first larvae they choose in such an emergency can be too old. The subsequent ones will be larvae of the right age. Rendering the whole colony queen less will cause a considerable set-back for the colony. It is better to make-up a five or six frames nucleus, ideally with no other very young brood, although very crowded with bees from your out-apiary. If you insert your frame with grafted cells into this fairly small queen less colony, you can get a large number of queen cells started. These  can  be  transferred the  following  day  and  finished  in  the  ‘finishing  colony’,  in  the  top  brood  box  of a Demareed, queen right colony as described in the next paragraph.

Supersedure

Bees, which naturally supersede, are desirable. This is not under our control although we can simulate supersedure artificially. The queen should be at least one year old, since a younger queen, particularly a current season queen, produces too much of the queen substance pheromones for this method to succeed reliably. If we exclude the queen from a part of the hive where there is young brood, the bees will often feel as though the queen is  failing and  they may be  willing to build queen cells; usually, but not always.  Such conditions are easily produced in the upper brood box of a Demareed colony, which is the original vertically split colony concept for the swarm control.  If  bees  are  not  willing  to  start  queen  cells,  we  can  achieve  their  co-operation  by  temporary confinement.  Placing  a  temporary  barrier  under  the  upper  brood  chamber  of  the  Demareed  colony,  such  as  a travelling screen, or a Snelgrove board, or a Cloake board, will persuade bees to co-operate and a large number of cells  will get accepted. The barrier must be removed and replaced with a queen excluder the following day, once the grafted queen cells have been started.

This method has the advantage of inducing the non-swarming strains of bees into raising queens.

How  do  we  recognise  the  cell  has  been  accepted  and  started?  In approximately twelve to eighteen hours there appears a newly extended wax collar on each accepted cell. Because grafted eggs are often rejected, we try grafting larvae, which are only about a day old or less. The larvae should be no bigger than 8pt letter c, but preferably, after some practice, larvae no bigger than a comma or an apostrophe are better, producing better queens.

Stage2: Cell building this is the period from graft acceptance to the sealing of the cell. Bees continue feeding the larva and extend, build and complete the cell by sealing it. This is the most important stage, as it is during this short period of a few days, that bees decide whether a larva should be born a queen, or a worker.

The best grafted queen cells are nursed and built in a very strong, well provisioned, prosperous, queen-right colony, with plenty of young nurse bees, which will generously feed the young, grafted or transferred larvae. I often use a colony, which is very vigorous, healthy, but may not be always the easiest one to live with.

Before  we  select  a  suitable  colony  for the  cell  building,  it  is  worth  checking  its  nosema  status. A colony heavily infected with nosema spores may not show any symptoms, however it should be rejected for such task, as nosema is the vector for the black queen cell virus.

The selected colony is usually Demareed, comprising of at least two brood chambers, which are separated by one but more often by two honey supers, or by a third brood chamber.

Stage 3: Incubation

This is the period from the cell being sealed to the adult virgin emerging.  Cells need warmth, humidity and quiescence during this time.

Large  scale  breeders  incubate  sealed  cells  in  electric  incubators  in  a  similar  manner  to  hens’  eggs,  or  in  the specially designated incubator colonies, allowing virgins to emerge in to individual little cages. These prevent the first queen to emerge destroying all others in the batch.

As most of us operate on a small scale, it is easier for us and better for our queens, if the first five or six days of the incubation period during the transformation or metamorphosis are done in the cell building colony and we let our bees  manage  the  temperature  and  humidity  requirements  of  the  sealed  queen  cells.  Freshly sealed cells require a complete quiescence during their first few days of pupation. After this period of quiescence, on day five or six of metamorphosis,  or  on  day  nine  or  ten  after  grafting,  the  larval queens’ transformation is close to completion, the cells are more robust. They can be now carefully taken out of the cell building colony to be distributed into mating nucs for their emergence and mating. Adherence to these crucial timings is essential. Distribute the sealed cells too early and some of the emerged queens will be injured and deformed. Leave it too late, and the first virgin to emerge will kill all others in your batch.

Stage 4: Emergence and mating nucleus

Professionals,  raising  queens  for  sale,  use mini-nuc  hives for  their  virgins  to  mature  in  and go  on  their  mating flights. Such small colonies require precise timing, very intensive management, careful feeding, etc., for the virgins to mate and start lying successfully. The queens must ‘get on’ with the whole mating process in a hurry, as the number of bees in such nucleus can initially dwindle, and only much later rises rapidly.

The  use  of minimating  hives is  very  economical  on  bees,  as  relatively  few  are  needed  for  each  small  hive.  The most  commonly  used, Apidea,  or  similar  size  hives,  require  only  about  a  mug  full  of  bees.  The queens mated in mini hives are often superseded later in the same season.

Better queens are produced in the larger mating nucleus hives. These can be full size frame ‘normal’ nucleus hives, or dedicated mating nucleus hive containing three or four full size frames, allowing the queens to emerge in larger colonies. Two  frames  of  emerging  brood  and  one  frame  of  food,  with  all  attached  bees  will  make  quite  suitable mating colonies. The queens, mated from these larger nucleus hives, can take a little longer to mate and longer to start laying, but invariably such queens will turn out to be much better mated and longer lived.

The cell building colony with all its frames and bees can be used for distribution into mating nucleus hives, which can be conveniently arranged in a circle around the parent colony. The entrances should all face inwards towards the centre of the circle. Once empty, the parent hive is removed from the site. The mating nucleus hives with full size  frames  can  be  supplemented  with  frames  of  brood,  but  with  no  bees  attached,  from  the  top  chambers of  the other supporting, Demareed colonies from within your apiary. These larger nucleus colonies can be built into full colonies, or to over-winter as nuclei, or they can be used for the re-queening of your existing colonies.

Mating hives house small colonies, with few foragers.  The amount of food available to them must be closely monitored and if needed supplemented frequently. If you feed sugar syrup, do so late in the evening, preventing the bees from the big colonies robbing your small nuclei hives.

Once your queens are mated and within about two weeks start lying, they can be marked. After  about  three  weeks  from  the  set  up  of  your  mating  nuc,  if  there  is  no  evidence  that  the  queen  is  laying, dismantle the colony and destroy its queen.
“How To” – NUCS!

Nucleus Colony

Finding a local beekeeper that sells starter colonies, known as Nucleus colonies of bees, or ‘Nuc’ is essential

Where Do I Put My Hive?

You need to find a location for your hives. You don’t need a lot of space, but you need the right conditions.

Here is a list:

Must haves:

  • At least 20 feet of room for bees to fly unobstructed. They will need a “flightpath” out of the hives where people aren’t walking.
  • Sunshine in the morning
  • A flat, level surface
  • Access to this space 24/7 without needing to make arrangements.
  • Located at least 100 feet from sidewalks, doors, pet areas, and any other areas that see heavy people/pet activity.
  • Not too windy or places where temperature swings are minimal. Rooftops are difficult places to learn beekeeping.
  • A good water source nearby, either provided by you or a natural source like a creek. Bees prefer pool water or a drippy faucet on soil for some reason.
  • Urban areas with lots of irrigated gardens around them
  • Places where they cannot be seen from the road or by neighbors
  • Places where you can keep more than one hive, since they can share resources when you pair them up.
  • Space between your hives so that bees know which one is their own. The hives in this photo are very close together, not ideal but makes for a pretty photo and easier to work this way.

Preparing With Hive Set-up

What equipment do I need?
You need to choose the right kit system that works best for you. Best to keep it simple and increase complexity as you know more. There are many types or systems you can choose from, we’ll mention the most common in the UK

Langstroth Hives: these are most common and preferred to beekeepers

BS or National Beehive: the frames are a bit smaller than the Langstroth ones.

WBC Hives: double wall hives their frames are the same size as the National.

Smith hive: is popular in Scotland especially the Borders where it originates from. Its a single walled hive and is easy to handle and manipulate.

Tools:

Veil or Suit

Leather bee gloves

Hive tool

Smoker

You will also need a base to set the hive on, since it doesn’t do well on the ground. Use mason blocks from any hardware store, a sturdy palette, Remember, it needs to be level!

Hiving Your Nuc

Your bees will orient themselves to their new locations based on polarized vision and recognizable landmarks. Bees will orient themselves so they can find their new hives, and if they orient themselves to the wrong part of your garden, they won’t be able to find home.

What you do is place your nuc box right next to where the new hive awaits. The bees will then be able to shift over a few inches to find the hive as you make the transfer. If the bees cannot be move into their new hive right away, place the nuc box in the spot your hive will be and allow the bees out to forage. When you move them into the hive keep it in that spot and they will already know where home is.

Fire up your smoker and give the entrance of the nuc box a puff or two of cool smoke. This will ensure the guard bees at the entrance are calm and you don’t get a big reaction your first time opening the hive. Smoke interrupts the ability of bees to signal danger. There are only a few dozen bees in nucs who are programmed to signal danger, but if they get fired up, others will join in the cause. This is why smoke is the universal tool for all beekeepers worldwide, no matter if they keep bees in traditional ways or our more modern systems. Don’t skip the smoke because you’re concerned about the health and wellbeing of the bees- this is a foolish notion based on a failure to understand honeybees. Bees are amazing and wonderful, sentient creatures, but it is in their nature to sting, and they have just been through some trauma while on their trip to your apiary, so do not set yourself up for failure on your first day. It will be less stressful for you and your bees, because you will make fewer mistakes as a new beekeeper when you get prevent yourself from getting stung and keep a cool head.

Make a space in the hive box by pushing the empty frames to either side of the hive. The frames from your nuc go into their new hive in the center, with brood in the very center and resources on either side, and finally the empty new frames on either side. As your bees consume their resources they will be foraging for new resources, which they will begin putting in new combs as they expand. The old honey and pollen combs will become brood comb where eggs will be as the colony occupies more frames.

It’s not a bad idea to feed nucs when they are in their new home, at least until they have filed out the first box with bees and resources. This box must be full before winter at the very least, and feeding helps the bees build wax. It takes many pounds of honey or other carbohydrate sugars to produce small amounts of wax, and without wax its hard to make new bees to gather honey and there’s nowhere to put honey if there isn’t any comb.

Don’t spend too much time moving the nuc into their new hive. They’re bound to be grumpy, so you won’t see them at their best, and being quick will be better for everyone.

Remember to check and make sure the hive entrance is at its smallest opening so the small hive can defend itself from other bees who may rob them and from Wasps or Hornets.

Inspecting Your New Hive

Save your first inspection for a few days after you’ve placed your nuc in their new box so you aren’t trying to do it while the bees are stressed.

Inspections this time of year will be to assess the build-up of the hive’s population, how well they are building new comb and if they need more room, and how their overall health looks. A nucleus colony will have a minimal tendency to swarm if setup correctly and promptly, so don’t worry too much about that for a while.

You don’t need to see the queen, Just look for her eggs. When you see eggs, stop looking for the queen. Its very important not to keep frames out too long, because they need to be kept at a stable temperature for the larvae to develop properly. It stresses the bees to have frames out too long, and sometimes foreign bees can start robbing the frames of honey. How long is too long? Depends on the temp and situation, but if you always try and make it quick, then you’ll be fine.

Look at the brood next. Healthy hives have brood that is grouped in rings of the same age. Capped areas should be fairly uniform with cells mostly capped, not too many gaps. Look at the larvae and make sure the smallest ones are “wet” looking, not dry. Look for dead larvae. Take notes.

More About Feeding Bees

In addition to sugar, the bees need pollen. Bee supply stores sell pre-made patties, and you can make your own with powdered commercial pollen supplement or by mixing your own with raw ingredients. The pollen patties should be added as close to brood as possible, and in this case I’d put them right on top of your frames where they can get to them easily. Remember to place the patties to that bees can still get around them!

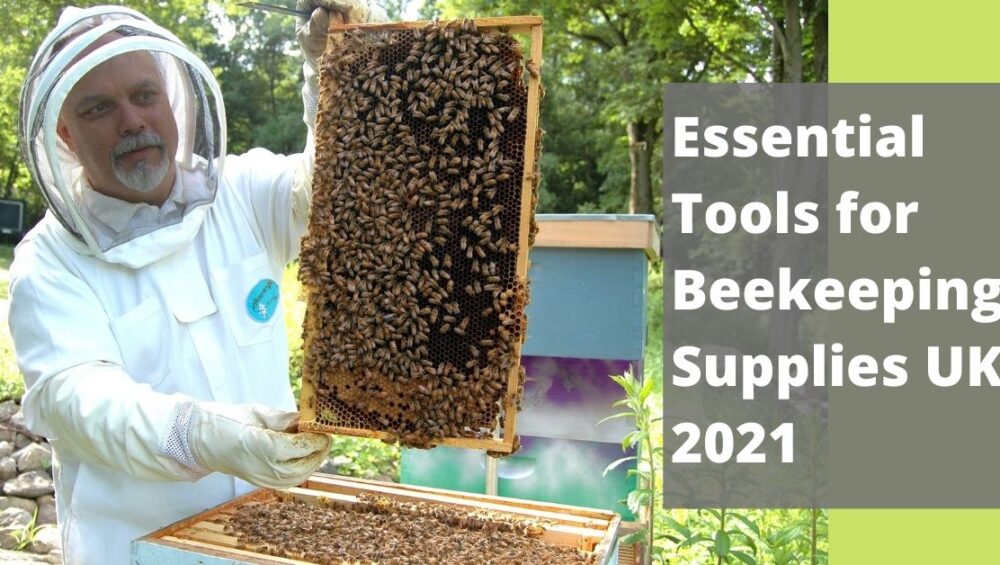
Essential Tools For Beekeeping Supplies UK 2021

Spring is setting in. Though we are under a pandemic crisis to go around and enjoy the blooming flowers, our little buzzing friends are not! Now is the perfect season for an enthusiast to start their journey as a beekeeper. 

Known technically as apiculture, the art of bee rearing is not to be taken lightly. Honeybees are the epitome of pollination and the main medium through which some species of flowers get the chance to reproduce. They are tireless workers, and their honeycomb is the amazing treasure house of their hard work. There are many reasons why people prefer the art of apiculture. The multitude of products like honey, beeswax, pollen pellets, royal jelly, etc, that these bees produce, or just maintaining colonies of bees to keep the rate of pollination from reducing are some of them. The byproducts made from honeycomb are used in many industries, especially in the food (for obvious reasons, honey) industry and medical field. 

Bees have attracted multiple people in the past; either because they have been stung by them or because they were after the honey. In ancient Greece, where beekeeping is a form of agricultural art, many famous philosophers like Aristotle and Theophrastus started to document their observations about the activities of bees. As “Necessity is the mother of all inventions”, people found ways to avoid getting stung by the bees when they tried to steal the honey from their honeycombs. In the process, they invented the first tools like the screen veils and discovered smoke to be valuable self-defense against the bees. 

With time and many curious minds with sharp observational skills, the mysteries and details of bee behaviour and their colony hierarchy came to light. With this information at hand, the development of the wax-comb, a starter cob on which bees build straight combs rather than their natural combs for easy extraction of the honey and wax. Modifications like this brought in other enthusiasts and allowed them to get started. 

So, science helped in refining beekeeping strategies and aided in the designing of new tools too. These beekeeping supplies are what a basic apiculturist needs to get started. We’ll look at some of the important ones that will suit any enthusiast of apiculture! 

Beekeeping supplies – The basic tools

  • The Hive: This is the fundamental tool that acts as the backbone to your entire apiculture cycle. Synthetic honeycombs come with outer covers for better protection against the changing climatic conditions and an inner cover as insulation and a divider between the bees and the outer covering. They also contain regions called ‘Honey supers’ where the bees store the surplus honey, which is collected later. Other components, like the Hive body or brooding chambers and Queen excluders, are installed for better comb organisation so that the bees can store honey for their purposes. It also has a bottom stand which helps maintain a dry and insulated hive. 
  • A Hive tool: The bees produce a glue-like substance called ‘propolis, and they use it to keep the contents of the hive intact. This resin is pretty strong, and this needs a tool to scrape the comb from the hive sides and borders. There are different types of this hive tool. Generally, it has a flat, sharp, square-shaped end for scraping. Frames and supers are also pried apart with this tool.
  • The smoker: This is one of the essential beekeeping supplies and a rendition of the technique which people developed in the 17th century. Smoke was used to driving out the honey bees from their honeycombs, and to collect honey without having to face the stingers. Smoke creates an environment that simulates a wildfire, causing the bees to fly away in alarm. But before they do, they gulp down their honey to prepare themselves for the sudden escape. Therefore, they become docile to attempt to sting those trying to steal their honey. Guard bees release an alarm pheromone (that smells like bananas!), which alerts all the members of the bee community in case of an emergency. But, smoke masks this effect and the guard of the honeycomb is let down. The tool is a stainless steel container with a heat shield covering and a grate at the base to propagate burning embers. 
  • The jacket with veil and gloves: While the bees carry their stingers as a weapon, the apiculturists need this veiled jacket to shield themselves from the painful stings they will encounter. The main reason that the bees go into attack mode is that humans exhale CO2. Our nervousness displays itself in the form of heavy breathing, and bees can sense that. But, as first-time beekeepers do feel the fear of the stingers, this jacket keeps them protected. These jackets may or may not have ventilation, but ventilated ones are more preferred so that the wearer doesn’t feel suffocated. 

One of the beekeeping supplies that cannot be neglected is gloves. In rural areas, people resort to gunny bags that are wrapped around the hands, up until the elbows, to ensure protection. But now, we have developed soft leather materials for this purpose with ventilation above the wrist area. 

  • Feeders: During the autumn and winter seasons, when nectar is unavailable or sparsely available, the feeders come to the rescue of the bees. They are used to feed sugar syrup to the honey bees. This can be either a container placed outside the hive so that the bees swarm and feed on them. Or they can be plastic bags, placed inside the hive, above the brood combs, within an empty super. During the time of feeding, the beekeeper cuts a small slit into the feeding pouch, allowing the bees access to the sugar syrup. 
  • Bee Brush: This tool is one of the beekeeping supplies that gets stung a lot! It is mostly used to move bees away from the area the beekeeper is trying to work on. The reasons behind this are usually common ones such as harvesting honey or repairing a hive frame and even repairing a broken comb. An alternative tool would be the bee blowers. 
  • Uncappers: The honey is stored within the hexagonal cells of the stacked honeycomb. But bees are extra protective of their honey. They encapsulate it by sealing the borders of the cells to keep the honey intact within the cells. This is one of the most helpful beekeeping supplies where the extractor (the person who extracts honey from the comb) can uncap the sealed hexagonal cells. These are knives that need to be dipped in hot water to pop the wax sealing out. Nowadays, there are electrically heated knives that do the trick, only faster. 
  • Bees: This may be the last thing we’re mentioning, and yet it is the most crucial component, Bees! Swarms of bees are usually caught from a swarm or bought from trusted breeders.

COVID-19 and Beekeeping

For the art that is beekeeping, our love for it might end up with us having to work in the outdoors most of the time. Though we usually have our protective gear on, there are times when we have to interact with other people to ensure the work gets done properly. During these times, we need to understand that the COVID-19 pandemic still is very active and is growing constantly. As a result, proper precautionary measures need to be taken to ensure safety. As cleaning and sanitary conditions are highly essential in the current situation, we provide you with a checklist on how to keep your beekeeping environment safe. 

COVID-19 cleaning checklist

  • Clean all the storage containers and surfaces with approved disinfectants like 70% ethanol solution or diluted bleach solution. Repeat these processes as frequently as possible. 
  • Before picking up your bees, make sure to have the sanitised set up with all the essential beekeeping supplies ready. Also, make sure to carry sanitisers and disinfectants. 
  • Wipe the box containing the bees with disinfectant and avoid getting cleaning products on them. 
  • Maintain as much social distancing as possible and wash your hands as regularly as you can. 
  • Disinfect your transport vehicles regularly, most preferably before and after transport. 
  • Most importantly, wear masks and use disposable gloves where needed. 

Maintaining a smooth business regime amidst this chaotic condition is hectic. But, in beekeeping, since bees do most of the work for us, all we need to do is take proper precautions and stay safe! Happy Beekeeping!